Bad Day on the way to Banderas Bay

Posted by John

A funny thing happened on the way to Banderas Bay. We ran out of fuel. Or maybe we didn’t. Maybe we just had clogged fuel filters. For whatever reason, which we still don’t know absolutely for sure, the engine just up and quit sometime around 3 AM on Tuesday. We were left going nowhere, in the ocean, at night, with zero wind. It was nine hours before we got on our way again.

Both Puerto Vallarta and La Cruz are on Banderas Bay. It’s a popular starting point for the Puddle Jump and others going to French Polynesia. There is a large cruising community there, a sailing school and many boating related businesses. We had ordered some flags made by a woman in La Cruz and needed to pick them up, and we wanted to meet up with some of the Puddle Jump boats. Some of Robyn’s friends from the Baja Ha-Ha were there. We emailed the La Cruz marina asking for a reservation, but hadn’t heard back before we left Mazatlan.

Back when we were in Puerto Escondido, Robyn swapped a paperback that she was done with (some teen fantasy) for a paperback copy of The Martian that had been on the bookshelf in the laundry room. I’m not convinced it was a fair trade, but the deal was done. We already had the DVD, now we had the book, too, so I read it. In The Martian, an astronaut is mistakenly left behind on Mars and has to figure out how to survive until the next Mars mission can rescue him. It’s one thing going wrong after another. Just when he solves one problem, another one pops up. I’ve felt a lot like that for this entire trip.

We did not get fuel before leaving Mazatlan at 7:30 AM. We had last filled our main tank in Puerto Escondido before crossing the Sea of Cortez. With zero wind on that trip across to Mazatlan, we ran the engine continuously for 53 hours. We have three fuel tanks. The center tank holds somewhere around 100 gallons. The port and starboard tanks hold about 50 gallons each. At an average burn rate of about one gallon per hour (we think), we planned on switching to the starboard tank around 3 AM. There should be another 20 to 25 gallons left in the center tank as a cushion. We know from experience that the center tank gauge will read empty, but there will still be 25 to 30 gallons in the tank. We’d hoped to sail at least part of the way to Banderas Bay, but again, there were very light winds and some fog so we were burning through our fuel.

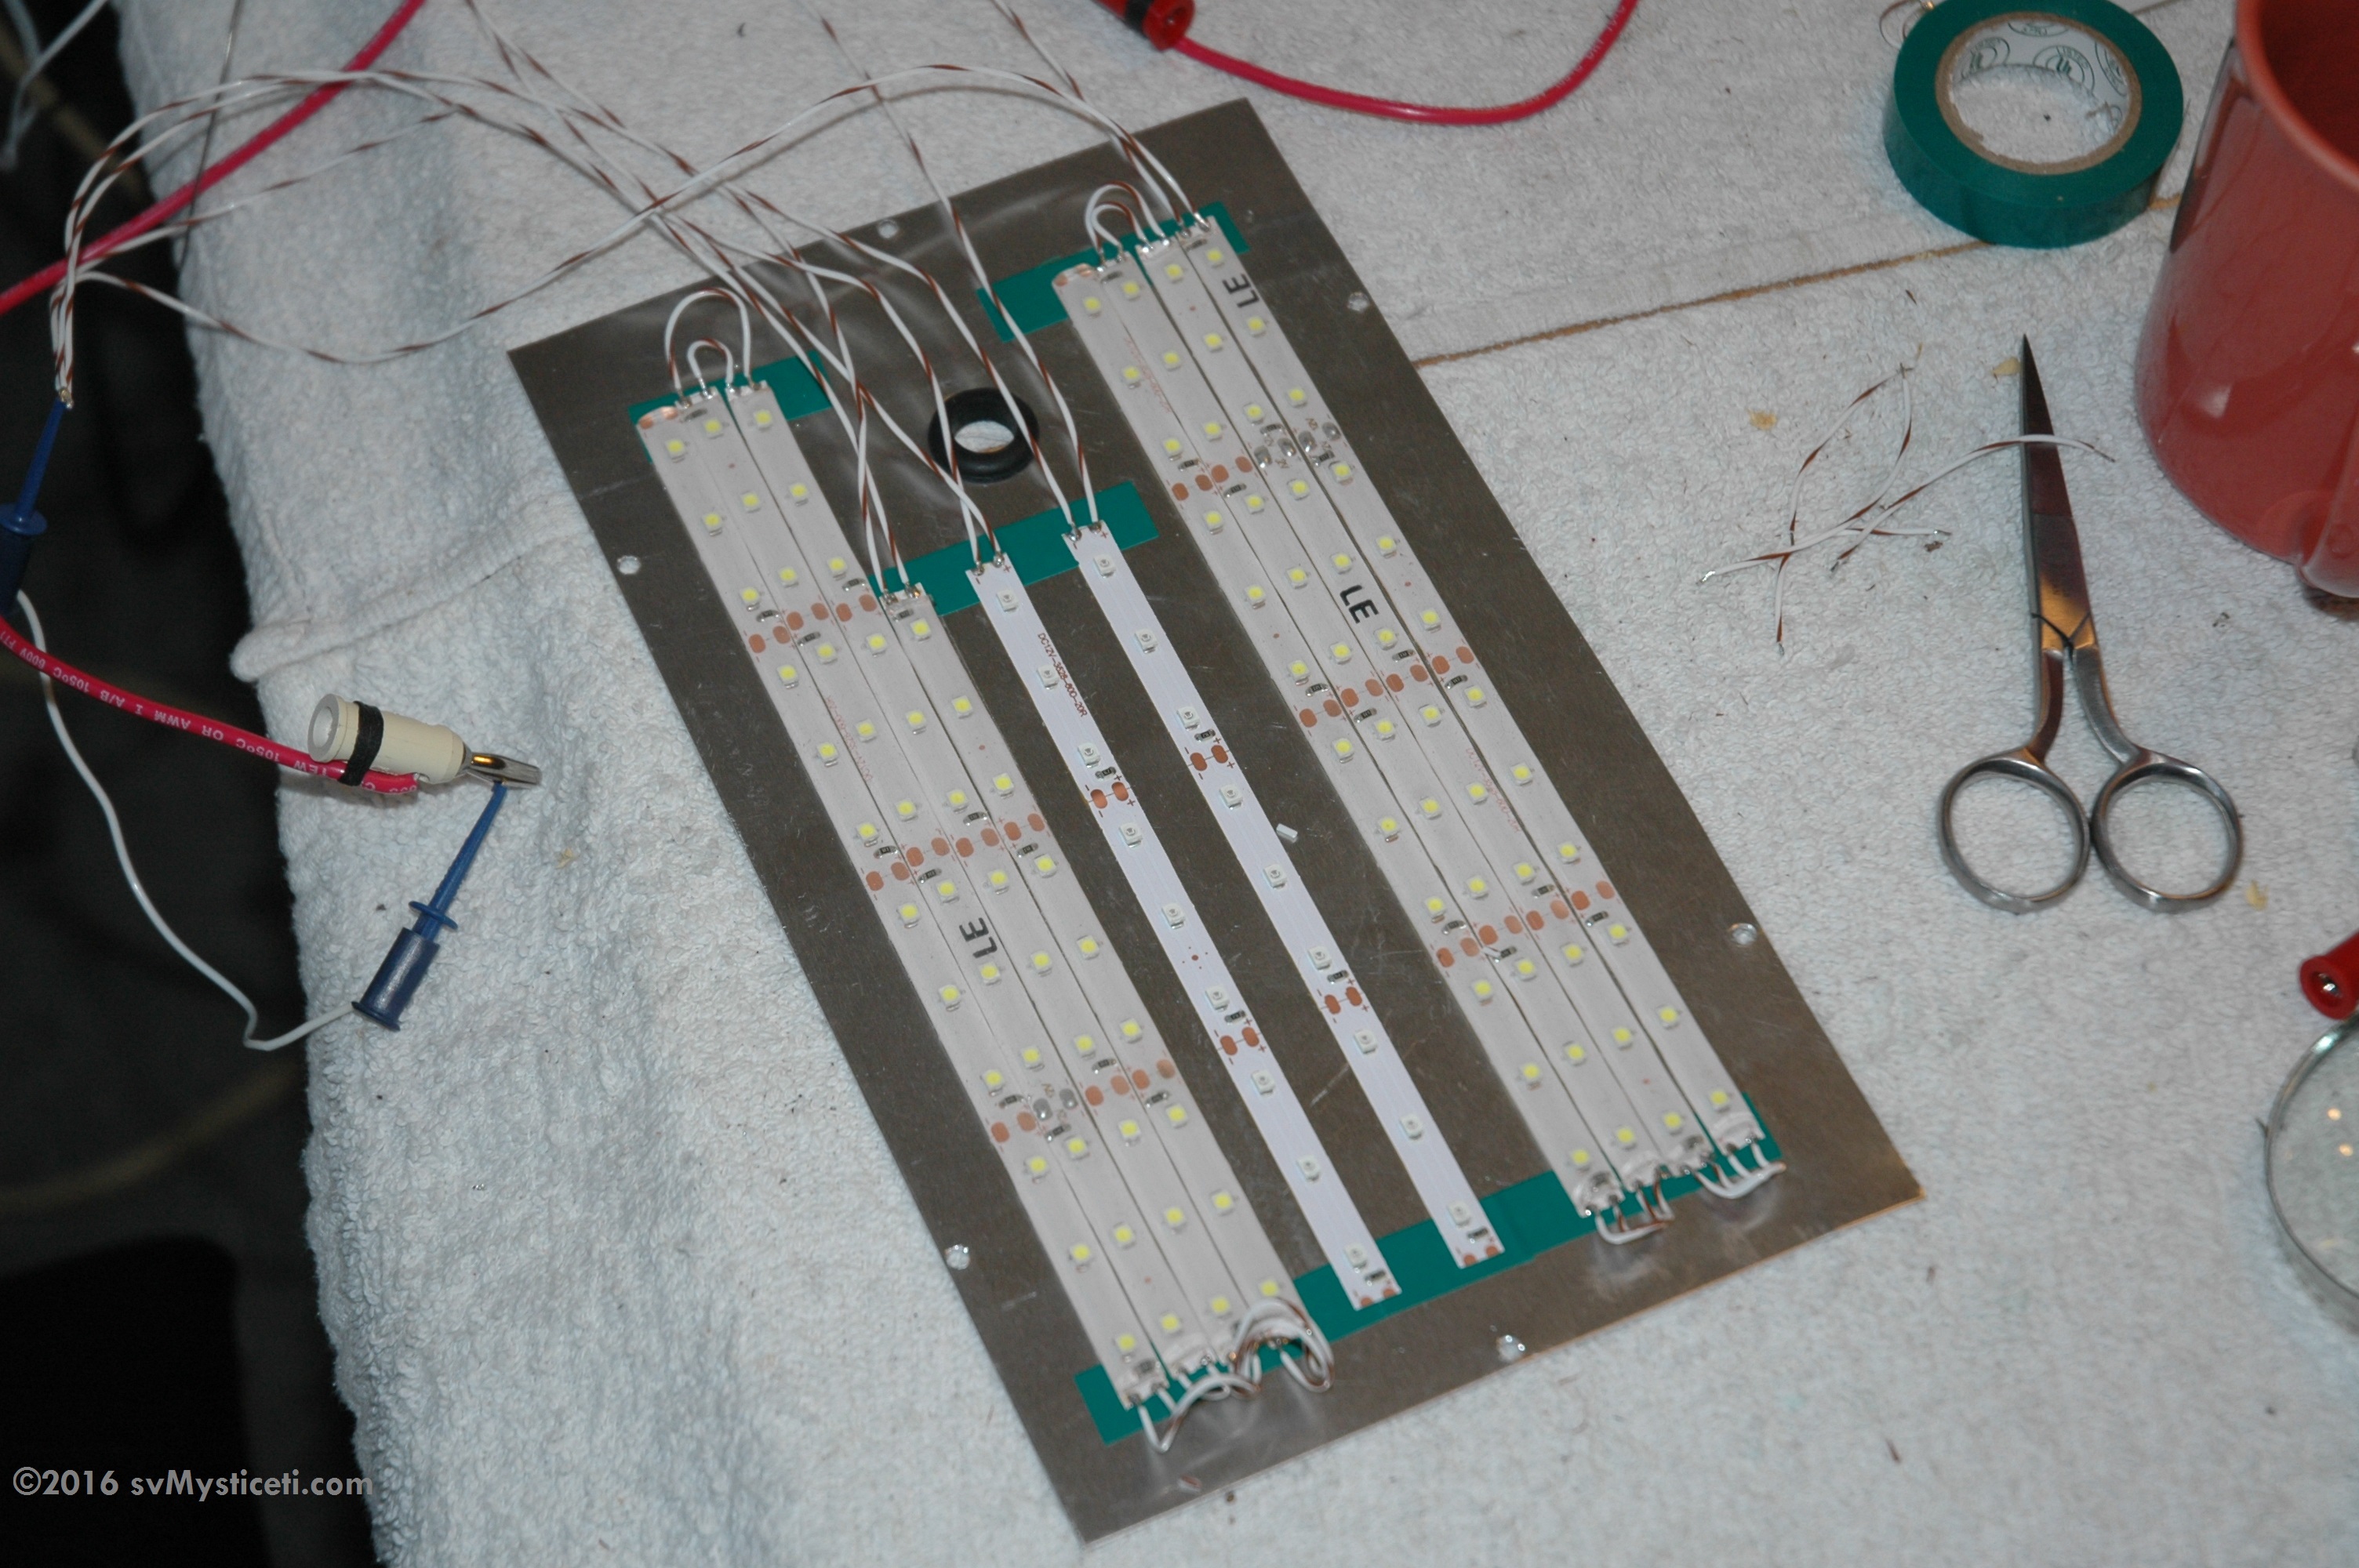
The fuel gauge for each tank is mounted directly on the tank. The center tank is the easiest to read. It only requires pulling back a small rug on the floor, opening a hatch in the floor, and reading the gauge. The starboard tank is a little harder to read. It requires opening a storage cabinet, pulling out much of what is stored in the bottom of that cabinet, opening a panel in the floor inside the cabinet, getting a flashlight and maybe a magnifier, and reading the gauge. Due to the location of the port tank gauge, we very rarely even try to read it. Let’s just say that a small mirror is most helpful, and so is the ability to bend your body in ways it normally does not. To make it more difficult, the plastic face of the gauge is clouded so only the relative position of the needle is discernible through the haze.

Pre-purchase survey photo from 2005 of Starboard tank gauge inside a then mostly empty storage cabinet.

Slight digression: I’ve been experimenting with radio email for almost a year. I’ve been trying to use Winlink, which is run by ham radio operators. I had a frustrating time finding stations to actually answer and accept my email, and finally learned that I might’ve been locked out of the system for six months. That might explain the disconnections I was getting on the rare occasions I could connect. We decided to stop messing around and opened an account with the commercial SailMail system. For several reasons, we held off trying to transmit in the marina and waited until we were on our way to La Cruz. It was early Tuesday morning, right about the time I should’ve been checking the fuel gauge on the center tank, when I sent the first email. My email connected and sent on the very first try and I was excited about that. That email produced the previous post about email at sea. Except for not knowing how to handle an “o” with two dots above it and messing up the word, it worked! But I didn’t know that at the time. It was my turn to sleep, but instead I was awake and thinking about the email—not the fuel tank—when the engine quit.

I immediately checked the center fuel tank gauge. It read empty. I went into the engine room and switched the fuel to the starboard tank. The engine and engine room were both very hot. We tried to start the engine again, but it wouldn’t start. If the tank truly was empty then there was probably air in the fuel lines. It would need to be bled out, but I’d never tried that on this engine before. On the other hand, we hadn’t run the engine long enough —according to recent experience—to go through all 100 gallons in the center tank. A blockage, such as a completely clogged filter seemed like it would also be a good reason, as would a fuel pump that wasn’t pumping anymore.

Fuel manifold for selecting supply and return tanks and transferring fuel. Sight glass on lower right just above yellow handle allows for visual confirmation of flow when transferring fuel.

The fuel line between tank and engine is quite long. Each tank has a supply line for drawing fuel out and a return line for running excess fuel back in. Diesel engines are fed more fuel than they can use and the excess fuel is returned back to the tank. Our manifold (which we custom built) can select one of the three tanks as the supply, and one of the three for return. We also put in a fuel transfer pump so that fuel can be pumped from one tank to another, either directly or maybe through external polishing filters, and we can either take a sample of fuel, or put in an additive, simply by opening and closing valves. We can even pump fuel out into a jerry jug if another boat really needs it.

Once out of the manifold, the fuel on its way to the engine first passes through a centrifugal water separator, then one of two Racor filters (only one is used at a time, if it should need changing, the fuel flow can be switched to the second filter and the first one changed while under way). Then it passes through a small electric fuel pump that was installed by a previous owner for the purpose of helping to bleed air from the lines, then on to the engine lift pump which is mounted on the engine and driven by a cam. The lift pump pulls fuel all the way from the tank, through the manifold and filters, and pushes it through the final fuel filter, mounted on the engine, and on to the injection pump which feeds the injectors. That is just about all I know about diesel engines, this one in particular, except that there is a lot that can go wrong in the fuel’s path from the tank to the cylinders, including no fuel in the tank to start with. One of those things was most likely preventing the engine from starting, unless it was something entirely different and far more serious and beyond my simple understanding.

Sitting in the engine room, completely covered in sweat (did I say how hot it was in there?) and looking at the manifold, I noticed that no fuel was visible in the sight glass. I had put a sight glass in the manifold for the purpose of being able to see if any fuel was being pumped by the transfer pump (Sight glass purchased from MSC Industrial Supply). I ran the pump and it easily brought up fuel from the starboard tank into the sight glass. The engine still did not start (I had to try). Then I switched back to the center tank and ran the transfer pump again. I was hoping to get nothing but air, proving that the tank was, indeed empty, but the sight glass filled right up with fuel. That would mean that the center tank was NOT empty, wouldn’t it? I switched back to the starboard tank anyway.

Next up was the centrifugal water separator. Water separated from fuel collects in the bottom of a canister, which then can be drained through a valve. When was the last time I had done that? I found a container and drained whatever was filling that canister. It was very dirty and smelled like diesel, but I couldn’t tell how much might be water. I began to wonder what happens if that whole thing fills up with water. I don’t know. I looked at the Racor filters. The bowl on one of them looked amber, the one actually in use looked black. I switched the valve handle to the amber-colored filter.

Then I realized something. When designing the fuel manifold, I worried about the transfer pump sucking fuel back out of the filters and engine. It probably wouldn’t if there was no air anywhere in there, but to be safe I had installed a valve to close off the supply to the engine so the transfer pump could only pull fuel from the tank. I had forgotten to close that valve when I’d just run the transfer pump, so maybe, maybe, the fuel I saw in the sight glass had not come from the center tank, but from the filters and engine itself. Then I thought, if that supply valve had been left open, couldn’t air get into the system through the fuel return and I could, indeed, suck all that fuel back out? It was too much to think about at this time, but it meant to me that the possibility of the center tank being empty was again the most likely problem. After all, the gauge needle was below empty. I just didn’t want to believe that I had let it run dry.

We have three old Perkins 4-236 manuals onboard. All three of them describe pretty much the same fuel line air bleed procedure, but with slight differences in terminology. There are three ports that you open to let the air out as you push fuel through the lines, closing the ports each in turn as fuel squirts from them. I tried this much of the procedure several times using the electric bleed pump installed inline after the primary filters, and also verified that the lift pump worked with the manual lever, at least. Each time I thought I had made some progress I tried to start the engine. The battery was getting weak. It still didn’t start, but there was still more to the procedure that I hadn’t gotten to yet. I was beginning to wonder why we had never practiced bleeding the fuel lines before we left home.

What I had trouble with was the rest of procedure. After those three ports were closed again, it said to loosen the pipe between the secondary filter and the high pressure pump and manually pump some more until fuel came out of that loosened connection. I could not get any fuel to come out. I even removed the connection nut entirely, and never saw any fuel. So, thinking that perhaps the secondary fuel filter might be clogged (it didn’t make a lot of sense, but I was running out of ideas), I changed it out with our one and only spare. This filter is not meant to be changed often. It is not entirely easy just to get to it. I had to remove the fuel return pipe from the injectors just to have room to get a wrench onto the bolt to get the filter off. After changing that filter, I also changed out the black Racor filter (as good a time as any). By this time it was well into Tuesday, we had sails up, and we were slowly making progress toward Banderas Bay, albeit at less than two knots with some 60 miles left to go. I really wanted to go to bed and “call the guy” in the morning, but there was no guy to call. Joe, the engine mechanic on Slainte, was hundreds of miles away. I wished we were still buddy boating so, if nothing else, he could give me some guidance. Perhaps if we could eventually sail close enough to La Cruz to make contact with the marina, they could send someone out to tow us in and then we could find a mechanic to take a look. That sounded like a good plan, but when I went through the mental image of the whole process, and what it would cost, it just didn’t sound all that good anymore. We already had a full schedule in La Cruz if we were going to leave with other Puddle Jump boats.

I went through the bleed procedure again, and again got nothing out of the feed pipe connection on the high pressure pump. It made no sense. How could I bleed fuel out of ports that were before and after this connection, but get nothing here? I got tough with it, yanked on the pipe connection, and it popped off—and there was the fuel—a lot of it. It had just been a tight connection. Who knows when it may actually have been last taken off.

My next problem was putting that connection back together again. I could not get the screw threads to line up. I was now angry that the procedure had made me take it off when clearly it hadn’t been loosened in years, and there obviously was no air in there blocking things. I bent it this way and that way, in a very limited space, and finally, with even more sweat and bashed knuckles, got it lined up and the threads started. By this time everything—tools, the engine, my fingers, even my face (from wiping sweat) was very slippery from being covered in diesel. I know people who like to work on cars and engines. I think that’s great. It just isn’t my thing.

The last step of the procedure none of the three manuals had any illustrations for. They simply said to loosen the connections on the two high pressure pipes at the atomizer ends (spelled atomiser since it’s British), which I assume were the fuel injectors, and turn over the engine until fuel runs out. But there were four injectors, what are the two pipes? Then, after reading it several times, I finally noticed that it was worded “…two of the pipes…” It did not say THE two pipes. It didn’t actually say how many there could be. So I loosened two of the pipes and cranked the engine, but the battery didn’t have the strength left to turn it over.

When we put in the golf cart batteries for the house bank last year, we kept the two batteries we had been using previously. They are the same type as the starting battery we still use. We had recycled the weakest one and kept the other one as a backup starter battery. I swapped it with the now dead battery. Checking everything one last time, I cranked the engine, and I kept it cranking. At last, not only did a fair quantity of fuel start flowing from the loosened injector pipes, but the engine almost started. I retightened the pipes, cranked one last time, and, after nine hours of trying, the engine finally fired up.

One more problem had been solved in our continuing journey so far, and as a bonus, I finally got some practice bleeding the fuels lines.

I can almost guarantee we will never run a diesel tank dry again. But I will also be very curious as to how many gallons it takes to refill that center tank. There should’ve been as many as 30 gallons left in there.

We actually made it to Banderas Bay and La Cruz before the requested start date of our reservation, which we learned had been accepted to begin on Thursday. We spent all day Wednesday anchored near the marina, wondering why our nearly drained backup starter battery was not automatically recharging. Once safely in a marina slip on Thursday, we did some troubleshooting and discovered we’d blown a 50 Amp fuse (really) in the charging circuit. We’re just not sure yet why that happened.

If you’ve read this far, then you deserve to know that I purposely did not make this a “long story short.” I just wanted to give a sense of some of what takes place onboard. Maybe somebody reading this who is thinking about cruising will actually try bleeding their fuel lines before they are forced to in the middle of the night. We were lucky that the engine didn’t quit at a more critical time.

This post also kind of balances out the idea that we spent the last month living in a tropical beach resort, sipping Mai Tai’s by the pool and playing shuffle board.

Mysticeti (left of center) in La Cruz marina. Also a good view of the wind generator up on the mast.
Finally installing the wind generator in Mazatlan.
Yes Dear, I did sneak one in when you weren’t looking, but where’s the Mai Tai?

Goodbye Baja

Posted by John

On February 14th we said goodbye to Baja California. It wasn’t that we wanted to. In fact, we were getting used to the place and what Robyn calls “desert sailing.” I asked an expert once why there was no air filter in our boat’s engine and he said it didn’t need one because there are no dusty roads on the water. I’d have to disagree. Sailing in the desert with virtually zero rain, our boat was covered in dust all the time.

Before we left home, when looking at pictures of some of these areas we’ve just been to, the dry hills did not look all that appealing. But photographs do not tell the whole experience. They don’t show the changing colors throughout the day, or the fantastic shapes of some of the rocks and mountains, or the contrast of the land and the sparkling water. They don’t show the stars at night.

The terrain is like a painted backdrop on a stage. It is a still life painting. Nothing moves except a few birds. On its own, it is eerily quiet. Even when the wind blows, there are no tree branches to sway; the cacti stand perfectly still.

The longer we stayed in Baja, the longer we felt we could stay. In many ways it is a rustic place: dirt roads, few people and long distances. The locals we met are all some of the nicest, friendliest, happiest people we’ve ever met. All of them, with the possible exception of the La Paz Port Captain (a different story for another time), were extremely patient and helpful with our attempts to communicate. We keep thinking that a little house built on a beach at the end of a dirt road, twenty miles from anywhere, with a front yard full of collected seashells, would not be a bad place to just hang out and let the world do its thing somewhere else for a while.

Saying goodbye to Baja also meant saying goodbye to our buddy boat, Slainte, and Joe and Cathy. They’ve been our traveling companions, who were never too far away (although, somehow usually ahead of us), since last June when we moved out of our house, onto the boat, and dropped anchor near them in Port Ludlow Bay.

We had been planning to stick with them a little longer, to keep moving north for another week before finally breaking off and turning south toward the Mexican Riviera. But talk of a cold front coming through by the weekend, with 35 knot southerly winds and rain (RAIN?) kind of spooked everyone. Joe indicated that he and Cathy wanted to stay inside the protection of Puerto Escondido until the system passed. We had planned all along to be in Mazatlan by the end of February—for Carnival—but that was negotiable.

From the additional weather forecasts we managed to get online through an intermittent cell phone hot spot, it looked like if we left immediately we could beat the first system and make it to Mazatlan before a separate system was predicted to hit there on the weekend. So we said our goodbyes, skipped a birthday dinner, and left.

Except for a serious failure of part of our brand new water maker, it was one of the most mundane passages yet. It was 52 hours of droning on and on under power for 325 nautical miles through calm seas with not enough wind to bother putting up a sail. We read second-hand books that we had bought at the ex-pat American-owned bookstore in Loreto. We took turns sleeping. We ate. Between the three of us, we saw a few whales, dolphins, a turtle, a couple leaping billfish and two other boats: a commercial fishing boat and a Baja Ferry. At times, the sea surface looked more like a calm lake.

We arrived Thursday afternoon at the El Cid Marina (part of the El Cid Resort) in Mazatlan. As we came in the narrow channel through the breakwater, we could already hear loud, unfamiliar birds in the trees. As a guest in the marina, we are entitled to all of the amenities of the resort hotel, including a very large hot tub spa that’s actually hot, and multiple swimming pools, multiple restaurants, and just about everything else you can imagine being available at a vacation resort. This will not be a bad place to take care of some business before the next major leg of our journey, as well as to figure out what the heck happened to the water maker boost pump. It has completely quit boosting, which really disappoints me. But by now I realize that if I let these things get me down, we’ll never get anywhere.

Joe sent us a message saying that the storm came and the wind hit Puerto Escondido with gusts swirling down the mountains at over 60 knots. Slainte was heeled over to the rail, even while sitting there tied to the mooring. At least one boat broke free, and several dinghies flipped. The sailboat, Shannon’s Spirit, from Victoria, B.C., who we had spent a Sunday afternoon with at Lupe Sierra’s Restaurant in San Evaristo, arrived here from La Paz a couple days after us and reported that they had just made it out of La Paz before the Port Captain closed the port to departures due to the weather. We are feeling lucky that we made the decision that we did, and that we had such a boring trip.

As far as the second system forecast to hit Mazatlan: it came on schedule two days after we arrived. We received a tropical deluge that, if nothing else, removed the last bit of Baja dust from our decks.

Leaving Puerto Escondido and the canyons of the Sierra de La Giganta.
I have not been able to adequately, photographically capture the bizarre shapes bulging out of the ground that are formed by some of the rocks in this area. That island in the center is covered with bulbous protrusions sticking out at all angles.
This sunset just wouldn’t fade and we watched it for quite some time before finally getting out the camera. The land to the left is our last view of the Baja peninsula.
Approaching the Mazatlan area, we are now officially in the tropics—again.
A page from our own “Log of the Sea of Cortez” tracking our progress from Puerto Escondido to Mazatlan. The chart on the left is simply a grid marked off with latitude and longitude, with our position plotted every couple hours from start to finish.
Marina El Cid. Iguanas sun themselves on the rocks around the marina basin.
These heavy wooden rocking chairs, each with a different first name carved on the backrest, are one of my favorite, if curious, amenities.
One of the swimming pools. The “caves” in the background lead to another section of pool on the other side.

Water maker failure update: The boost pump motor quit working because it was full of water. This appeared to be due to a missing seal around a screw that did not get assembled properly during manufacture. See photo below.

Disassembled pump chamber. The upper long bolt in this photo is unsealed. The seal for it was loose inside the pump chamber and is the small cone-shaped rubber washer to the right.

Water worked its way from inside the pump chamber to inside the case of the electric motor. Cruise RO Water has suggested that during fresh water flushing of the system, our boat’s pressurized water pump (we take flush water from our pressure system) may have forced the seal out of position from around the screw by causing too high of a pressure inside the boost pump chamber. This does not seem likely however, since the cone-shaped seal should’ve been pushed in tighter, you would think, if the pressure was too high inside the pump chamber. Our own usage experience and evidence suggests that the seal was knocked out of position as the bolt was inserted through the pump chamber during factory assembly, but of course, I don’t know for sure.

To be on the safe side, we are adding a valve to bypass our pressure water pump when flushing the water maker so that the water maker boost pump is pulling water from the tank rather than having it supplied under pressure. The boost pump itself is being replaced under warranty. We will get all this completed at such time when we are not floating around in a pool or sitting in a rocking chair.

Puerto Escondido

Posted by John

Puerto Escondido Bay on a calm day.

Puerto Escondido somehow became what we were aiming for after leaving La Paz. We knew it was a large and almost landlocked bay capable of holding many boats. We knew that it was near Lareto, the second largest city in south Baja after La Paz, and home to many retired Americans. We heard that a marina was being built, or had already been built. There was a fuel dock. There was a boatyard for repairs and bottom painting. We also heard that recently, anchoring had been banned inside the bay and permanent moorings with a charged fee had been installed to be used instead. And we heard a rumor that taxis into Lareto from the marina were prohibitively expensive.

What we actually found when we finally got to Puerto Escondido was all of that. And a round-trip taxi to Lareto and back, twelve miles away, was 1,200 pesos, or about $60 U.S. In Mexico, you can buy a lot of groceries for $60, but not so much if you have to double that each time you go into town to shop.

There is a marina, with nice offices and friendly, helpful staff, and dock space for a few boats (I really do mean a few). The “marina” really is more than a hundred mooring balls which have been installed in the bay. It is a hurricane hole. There is a fuel dock, free showers, free self-serve laundry and a few garbage cans for boat trash. However, there is not even one snack or drink machine. There is a restaurant, open in the evenings, but no café or bar & grill or snack shop like you’d expect. There are a couple of new glass and steel buildings, and nice landscaping, but the buildings have lots of empty space. Several nearby buildings are still empty shells. What has been built has obviously been built with big plans in mind. It just hasn’t reached its potential, maybe. There is also a solid cruiser community with a local morning radio net.

Although we were technically not off-grid anymore, the public Wi-Fi for the marina was not operating most of the time. Even our Mexican cell phone had trouble holding a connection. Cell towers (tower?) appeared to be some distance away.

We hired a couple of young guys to come out to our boat to dive it and clean the bottom. Afterwards, their boat wouldn’t start and we towed them back to the marina dock with our dinghy and its little 2 HP motor. Their boat greatly outweighed us and I wasn’t sure it was going to work until we gained some momentum. A few days later we saw the same two guys using their boat to tow a 40-foot sailboat. One guy was towing, the other guy was steering the sailboat. They saw us, and you could tell they were making sure we saw them.

We had an odd experience in a grocery store in Lareto. Sometimes I’ll go into a store and feel like I’m in another country. This was true in a Costco we used to go to in south Seattle where it seemed like most customers were speaking Chinese or Vietnamese, and it was especially true of a Costco we went to in Chula Vista, California which even had a Mexican currency exchange window. But at the Pescadora in Loreto it was the opposite: we were in a Mexican store, yet it seemed like nearly every customer was an American speaking English.

I think there might be some kind of deal between the local taxi company and the rental car companies. It can actually be cheaper to rent a car for a day than to take a taxi to town and back. So we rented a car—twice. We made two shopping trips to Lareto, and shared a car with Joe and Cathy from Slainte for a sightseeing trip.

The plan was to go to a 300 year-old mission built in the mountains. That sounded okay, but who knew it was 25 miles up a narrow, winding mountain road, over a pass, and part way down the other side? For a while, we thought maybe we’d gone so far that we’d soon catch a glimpse of the Pacific Ocean, but we didn’t. We met some friends of Joe and Cathy’s there for lunch. It was a fun trip, and nice to get off the boat and above sea level for the day.

San Javier Mission, built 300 years ago, somewhere in Sierra de La Giganta.

We had a tour guide, and Joe’s friend’s wife spoke Spanish, so we got the story, pretty much. Apparently, the mission failed because they couldn’t make it self-sufficient, but not for lack of trying. There is still an original 300 year-old olive tree on the grounds.

The natural spring water and lush vegetation gives the place an oasis feel.
Back at Puerto Escondido, teaching Robyn how to relax and contemplate the future.
The entrance to the bay is through the low gap on the left, to the right of that is the marina and buildings. This was a very calm day. We also endured a couple of days of winds gusting over 30 kts and whitecaps in the bay. This is the farthest we’ve regularly dinghied to shore yet. It’s nice not having a leaky dinghy anymore.
Fuel dock, with boat yard behind.
What we really wanted was a holding tank pump out. We waited over an hour for the pump to be brought, the hose primed and the connection to the sewer made. We also topped off the fuel tank. It was a nice day to just sit there for a while. They could make some money if they put in a little store with cold drinks and ice cream.

Way back in April last year (seems a lot longer ago) we bought a wind generator to sit on the bracket that came already mounted on our mizzen mast. The idea was that it would provide some battery charging current when the wind was blowing, whether the solar panels were getting sun or not. At the time, we were thinking simple things, like radar and GPS and lights. Now we have a water maker (battery killer), rudimentary refrigeration, electronic toys that constantly need charging, and other things that use far more power than we needed a year ago.

We had identified from Google image searches the particular model of wind generator that the bracket had been made for. Unfortunately, the company had gone out of business but we found a generator available in a warehouse near Seattle. We bought it, and it has been taking up space in the aft cabin since Day 1 of our trip. We’ve since heard that it is back in production again, as was expected, by a different company after it bought the tooling and manufacturing rights from the original maker.

I had envisioned installing the wind generator on the mast some sunny, unhurried day, maybe while anchored in a calm bay in Mexico surrounded by dry hills and a gentle breeze. That time and place turned out to be now, in Puerto Escondido. It was becoming a running joke that we needed to spend a few days to work on our wind generator, but something always interrupted us. So, already staying longer in Puerto Escondido than we had originally planned, and with the joke getting old, we dug it out, assembled it into its very awkward and heavy shape, and went about getting it up the mast.

We had had months to come up with a plan—I’ve spent oh, so many lazy afternoons lying in the cockpit gazing up at that bracket and imagining how we were going to get that thing up there. We executed the plan nearly flawlessly, except for one minor problem. The generator has a pin that fits down into the vertical pipe on the end of the bracket. It didn’t fit. The inside diameter of the pipe is 2 mm smaller than the outside diameter of the pin. That’s just one silly millimeter all the way around the hole, but there was no way it was going in.

When we had the masts and rigging off the boat two years ago I had measured the bracket. My measurements were in inches. The inside diameter of the pipe was measured at 1.5 inches. When we figured out that we were looking for an Ampair 100 wind turbine, made in England, the published dimensions we found were in millimeters. I converted all my measurements. Everything was right on to the published specs, except the pipe diameter. But I had measured that with a tape measure, probably rounding to an even 1.5 inches, or so I assumed. Perhaps there was some room for error there. But no, it is actually a 1.5 inch pipe, and 1.5 inches comes out to 38.1 mm. The 40 mm pin is actually 40 mm. It must be a metric standard pipe size. My measurement was surprisingly accurate the first time. A 40 mm pin does not fit in a 38.1 mm hole.

We lowered the wind generator back down to the deck. Then I went back up the mast and removed the bracket and brought it down for a closer look. Sadly, the inside diameter of the pipe was, really, truly, 1.9 mm smaller than the outside diameter of the Ampair pivot. How could this be?

I spent a long, mostly sleepless night going over all the possible solutions in my head, and rejecting most of them. One of the most intriguing to me, in the pre-dawn hours, was to disassemble the wind generator and remove what I had convinced myself was simply a chunk of anodized aluminum which was the pivot that fit into the pipe, find a machine shop in town, and have the guy skinny it up by 2 mm.

But then, as the sun came up on another day, one of the fundamental differences between me and Julie came into play. While I had spent all night fuming over it, even considering cutting our losses and putting the whole thing up for swap & trade on the morning net, she looked it up and found that there was an adapter available at the same warehouse near Seattle where we had bought it. The adapter is specifically for mounting a post-2001 Ampair onto a pre-2001 Ampair mizzen mast bracket. What do you know? Just like that, problem apparently solved—if we can get one sent to us here in Mexico.

In the meantime, after being here for two weeks, we’ve decided to leave Puerto Escondido and soon will be going our separate way from Slainte. They are heading farther north, eventually storing their boat and going home for the summer, while we will be turning back south and crossing to the mainland side of the Sea of Cortez. After coming so close, completion of the wind generator installation will have to wait until we can get the adapter.

The Ampair wind turbine all rigged up for hoisting and nowhere to go. The black pin on the bottom with the wire sticking out has to fit into the pipe that’s welded through the bracket.
The bracket after it was disappointingly removed for closer inspection.

Eventually we expect to be in Mazatlan for a while. We should have consistent internet access there.

Water Maker Installation

Posted by John

We decided to stay in the marina in La Paz through the end of the year. We had a water maker to install, a dog to take care of, and two boats to keep an eye on for friends who flew home for a few weeks over Christmas. Our crappy little dinghy doesn’t handle even the smallest wind waves very well, and the way the wind picks up at times we wanted guaranteed shore access with a limited amount of excitement. Anchoring out just seemed like such a bother.

Marina de La Paz, one of four main marinas used by the cruising community here, is one of the most convenient marinas we’ve ever been in. Unlike most of them we’re used to at home, which often seem to be out of the way at the end of a road and not within walking distance of much of anything (partly due to local terrain), this marina is within easy walking or bicycling distance of restaurants and shops of all kinds, as well as the waterfront of central La Paz. The marina is not huge, which is part of what makes it nice. All of the marina amenities are right at the end of the dock, with power, potable water and wired high-speed internet at each slip, plus wi-fi. A marine chandlery, with a surprising amount of stuff in their back room, is directly across the street. Another one is a several block walk away, but it seems to have an even larger variety of parts. A small convenience store, self-serve or full-service laundry, government paperwork office and a dive operator are all within the walls of the marina.

Several other boats from the Baja Ha-Ha, including some of Robyn’s friends, have also been around. A mile or so away is a supermarket with a movie theater in the same building. Robyn reports that not only do the seats recline, but they have a call button which brings an usher to take a food order or bring a blanket if the air conditioning is a little too much. She and her friends have also been to museums, a pool party, and even went with a guide to snorkel with whale sharks. Whale sharks are not whales, but are plankton eating members of the shark family and, at up to forty feet long, are the biggest fish.

It was Robyn, then, who agreed to dog sitting and boat watching over Christmas. Once this had been arranged, we knew we were staying for the duration. Rover has been great fun, and he’s helped us meet so many other dog owners. However, all is not fun all of the time. We have a water maker to install.

A water maker is a small desalination system for extracting drinking water from seawater. Water makers work on the principal of reverse osmosis. As a kid, when I didn’t do my homework, my mother frequently spoke of osmosis, as in, “Do you expect to learn that through osmosis?” But she never explained what it was, and I never asked. Or maybe I did and her explanation just didn’t stick.

As I understand osmosis now, if a solution of dissolved solids, such as seawater, is on one side of a semi-permeable membrane, and a solvent, such as water, is on the other side, molecules of the solvent will, over time, tend to move through the membrane to the other side. This results in less solvent and more solution. The online Khan Academy has a short video explaining the theory of osmosis in a way that makes sense even to me, but I don’t see how my mother could’ve thought I might learn anything through it.

Osmosis – Khan Academy

The goal of an RO water maker, therefore, is just the opposite, or, “reverse osmosis.” Reverse osmosis requires energy. A water maker pressurizes the seawater to force water molecules through the membrane, leaving the dissolved solids behind. Then again, except for the magical and expensive semi-permeable membrane, I’m not sure what “reverse osmosis” actually has to do with normal osmosis. Why not just say it is a really good filter?

We chose our water maker from Cruise RO Water and Power, in part because their systems do not come as one big, chunky box that needs a big boxy space to put it in. Instead, the system is made up of mostly commonly available component parts that you assemble yourself and install wherever they fit. Below is a simplified schematic of the basic system components for the Cruise RO Water, 30 GPH system.

Not shown in the simplified schematic diagram is the control panel with pressure adjusting valves, product water flow meter, power switches and water sample valve. The 30 GPH model uses two RO membrane assemblies in series, as shown. The first membrane can extract about 20 gallons per hour, and the second about 10 gallons more.

If the water maker is not being regularly used, then every few days it needs to be flushed with fresh water to prevent organism growth. The flush water is run through a carbon filter to remove any added chlorine that would be present from a municipal system. Chlorine will damage the membranes. For longer periods of storage, a pickling solution is pumped through the system. One of Robyn’s assigned boat sitting tasks is to periodically flush their water makers.

For our source of seawater we chose an otherwise unused seacock located inside a storage cabinet in the head, forward in the bow. This seacock had formerly been used as a source of toilet flush water, a saltwater foot pump for the head sink, and potentially as a water source for an anchor wash pump. We had disconnected everything from it years ago, and replaced the seacock when we replaced all of the seacocks in 2011. At that time it was capped off and left unused. The seacock connection is a one-and-a-half inch pipe thread. We needed to find bronze fittings that would get that down to a half-inch hose. Finding those fittings was a separate adventure at a La Paz industrial plumbing supply outlet.

We had been told to go to El Arco Plumbing by the owner of La Paz Cruiser’s Supply, an ex-Seattleite who is also the local Cruise RO Water dealer, and is quite knowledgeable in water maker installations. He drew us a sketch of where the bins of bronze fittings were located inside El Arco, behind a service counter. He said to just walk in there like we knew what we were doing. We would not be able to adequately describe what we wanted in Spanish.

No matter what you’ve sketched out on paper, there will always be something you can’t find but possibly can be substituted for with a minor design change based on what’s available in the store. With ongoing mental redesign while standing at the wall of bins, we eventually found most of what we needed to reduce the inch-and-a-half seacock inlet down to a half inch hose barb. We also found a few other parts we needed for the other connections to the water tanks and the fresh water flush. We took them to the counter where an employee looked each one up in the computer and printed out a ticket with the price totaled. But then we no longer looked like we knew what we were doing. He wouldn’t take our money or let us take our parts. It turned out that we needed to take the ticket to the cashier and then come back with the receipt. How embarrassing it was when I couldn’t see the cashier behind the darkened glass in the booth in the middle of the room even with half the employees pointing at her. I could see all their lips moving, but I couldn’t understand a word anyone was saying. The booth was in an odd location and looked more like a product display than a place to hand over cash. Eventually we got it all figured out, took our prized baggie of plumbing parts, and found our taxi still waiting outside.

We ran the reject brine discharge line through a couple of cabinets and then under the cabin floor to the engine room. It exits the hull high above the waterline through what we think used to be a bronze fuel tank vent that had been disconnected and unused since before we bought the boat. It took all of the thirty feet of brine discharge tubing that came with the water maker to make that run. The fresh water output from the membranes runs through a “Y” valve on the control panel and is sent to either a test port or into the water tank manifold under the galley sink to be fed to one of our three water tanks. That tube also runs under the cabin floor. The sample port is the outlet spigot in the head sink formerly used by the old saltwater foot pump. I had to drill several holes in order to run that tube.

Since the incoming seacock is located inside the head we also chose to locate the boost pump there in an awkward, under-used space across from the toilet. We put the 20 and 5 micron pre-filters and the carbon filter there as well. We tied into the head sink water supply to provide the source of fresh water for flushing the system.

Filters and boost pump. Incoming strainer is at bottom, boost pump and associated cooling fan is at top. Source selection valves are mounted on the carbon filter at left. Pre-filters are on right. Between the strainer and the seacock, we ran a half-inch, three-foot long piece of reinforced engine coolant hose to put the strainer above the waterline.

The purpose of the boost pump is to feed water to the high pressure pump at an adequate rate. We mounted the high pressure pump on a shelf in the main cabin, just outside the wall between the cabin and the head. The high pressure pump is heavy, so we beefed up the shelf with a spare half-inch-thick piece of plywood we had been carrying. The shelf is long enough to also accommodate the membrane housings, which are about four feet long. Two reinforced high-pressure hoses with swaged fittings on each end come with the system. One is three feet long, and the other is five. One connects the pump to the membrane assembly input, and the other connects the membrane brine output to the control panel high pressure gauge. We also fit the control panel onto the shelf, building a wooden frame on which it could be mounted.

High pressure pump and membrane assemblies, with control panel, still under construction. Wiring is not connected and tubing is not fastened up yet. Panel will be screwed to the frame.

To get the wood for the frame we took a trip to The Home Depot. Having built a couple of houses for ourselves, we are quite familiar with Home Depot and what they carry. But this is Mexico. We had heard mixed messages from people who had been to the La Paz Home Depot. The opinions ranged from, “They have everything you’d expect in a Home Depot,” to, “Don’t expect what you’d find in the States.” When we asked specifically if we could buy a board there, the answer was, “Sure, as long as it’s pine.”

When you first walk into the La Paz Home Depot it looks like any other. It’s only when you try to look for something specific that you start to get frustrated. With a taxi waiting outside in the parking lot, we couldn’t spend time trying to shop for the other projects we have lined up and needed to focus on what we came for. The lumber selection was, indeed, somewhat limited, especially in the area of trim or shelving. We were looking for a 1 x 4 that we could use to make a frame to bolt to the shelf and hold the control panel in a vertical position. The taxi was too small to carry an eight-foot board, so we hoped Home Depot would cut it for us. We found a 1 x 4. Well, it averaged out to a 4 inch width, anyway. It was a little less at one end and a little more at the other, but good enough.

Home Depot would, indeed, cut the board for us, but it was not as easy as just asking the nearest clerk. There was a window to go to, a ticket to fill out, a lot of gestures and pointing and confusion. Then we had to take the ticket to the check-out line and pay before going back to the window to have the board cut. There were other cuts for other customers ahead of us until finally, we achieved success. Once you know the process, either for the plumbing supply store, or Home Depot, it makes sense. It’s just not what we’re used to. Normally at Home Depot we’d just ask an employee if they could cut our board in half and they’d just do it and hand it back.

I suppose if we had still been at home with lots of time to plan and do, maybe even with the boat in a yard, and certainly not fully loaded with too much stuff, we would’ve laid out the system differently. The Westsail 42 has places where the water maker components could be mounted with space for the control panel nearby and the various hoses and filters all hidden away but still easily accessible. But we aren’t doing this at home, or with all the time in the world, or with a full compliment of tools and workbenches. If we had taken the time to do everything we wanted to do in the way we wanted to do it, we’d still be dreaming of our someday trip. No, we are underway, albeit stopped for a few weeks, and in Mexico, no less. We may not yet be living the definition of cruising—working on the boat in exotic places—but we’re starting to get the feel of it.

Meanwhile, our time in La Paz is running out and we’re likely to be leaving soon.

The marina restaurant never let us down for showing Seahawks games, although sometimes they were in Spanish.
The cruising community’s clubhouse.
Outside the clubhouse where coffee hour is held every morning. Inside is an extensive book and DVD library.
The marine parts store across the street. It is so handy when working on projects.
Rover, our temporary friend from the boat Waponi Woo…
…reminds us a lot of our old friend Max, shown here ten years ago.

An Exercise in DIY Interior LED Lighting Conversion

Posted by John

Most of Mysticeti’s interior lighting is fluorescent, with several being Alpenglow fixtures. Many of these can be switched between white light and red light to preserve night vision. Some can also be switched between high and low power.

I’ve always wanted to change everything over to LED lighting. Mainly for power savings, but also to eliminate the annoyances of fluorescent lamps. For one thing, the CFL tubes come on dim and take several minutes to warm up to full brightness. This is frustrating if you want light for just a few seconds, maybe to find something. Also, spare 12 volt fluorescent tubes of the proper size and shape are not that easy to find, especially if they have been dipped in some sort of red coating in order to produce red light. And most annoying to me is that the ballast goes bad. This may be just me, but over the last few years the ballasts in five cheap shop fixtures in our garage at home have gone bad. The box of replacement fluorescent tubes we bought still remains unused, and the money spent on replacement ballasts totals at least as much as that spent on the original fixtures. Key word here, I suppose, is cheap.

Years ago, when the ballast died in two of Mysticeti’s generic fluorescent light fixtures, we replaced them with completely new fluorescent fixtures from Fisheries (marine store in Seattle), for a lot more money than I wanted to spend. And when the ballast died in one of the Alpenglow fixtures, we just stopped using it because the process and expense of fixing it was more involved than I wanted to take on at the time, especially since what I really wanted was a good LED replacement of equivalent brightness.

The Alpenglow company in Montana now sells LED versions of the old CFL fixtures. They also sell LED upgrades, which replace the entire insides, including backplate and switches, with new. And they also sell replacement ballasts which you can wire in yourself. With a recent price for the ballast of $34, and a full high/low power, red/white LED conversion (with labor) being about $100, repairs or upgrades are not cheap. Upgrading all of our existing Alpenglows would be at least $1,000. Even a ballast replacement at a remote location would not be easy.

I’ve seen people using strings of LED’s that come on a tape reel with a self-adhesive backing. They’re available in several different colors including red, and are inexpensive.

We bought some from Amazon for only a few dollars each. A 300 LED, 5 meter string was $6.99. I’ve also seen them in discount parts and surplus catalogs for very low cost. Originally, we bought them to experiment with and see where we might have a use. Since the boat was tied to the dock for the dark and wet winter months, and I had some time to kill, I wondered what kind of LED upgrade I could do on my own.

LED reel

The LED’s are wired in a series/parallel combination every three LED’s.

LED tape

Series/parallel means that three LED’s are wired in series, along with a current-limiting resistor sized for 12 volts, and then the pattern repeats, with each three-LED-plus-resistor module wired in parallel. The wiring is accomplished through the use of a thin copper foil printed on a flexible strip which is the “tape.” Between each module the copper foil widens into connection pads, marked with a + and -. These pads can be cut through the middle with a scissors to form attachment points at each end of whatever length is desired. The back of the tape is coated with an adhesive material protected by a peel-off paper.

One of the white LED reels we bought is marked “waterproof.” Waterproof means different things to different people. Unless there is an associated IP rating, such as IP67, you really don’t know what the waterproof claim means.

What I do know it means is that the LED side of the tape is coated with a thick, rubbery, transparent coating which must be carefully cut away from the copper pads if you plan on cutting the tape into smaller sections.

Once the pads are exposed from the coating (not an issue on the non-waterproof version), they can be soldered to. This is a somewhat delicate task. Experience suggests that the very thin copper foil could be destroyed by too much soldering heat. The LED reels we bought came with a few extra edge connectors that slide onto the end of the tape and make contact with the pads. There weren’t enough connectors included for my use. I didn’t try using them.

Since the Alpenglow light fixtures seem to carry a certain amount of value (perhaps less so, now that LED’s are becoming the norm), my first rule of conversion was to preserve what I had. In other words, I was OK with taking them apart for now, but I wanted the option of being able to restore them back to original condition later.

The first unknown was how many individual LED’s would be required to match the full light output of the fluorescent tube. The next question was how much power did the Alpenglows consume before the conversion, so I could compare with what they consumed after. The power question was the easiest to answer. I put an ammeter in series with the power supply and measured the current directly. Here’s what I measured:

High power white = 0.840 Amp
Low power white = 0.430 Amp
High power red = 0.671 Amp
Low power red = 0.371 Amp

The question of light output was more difficult. I remembered that my dad had a photographic light meter when I was kid. Maybe I could use something like that to measure light output from the fixture. While wondering if that thing was still around, if I had it and where it might be if I did, I started thinking about the old photocells of mine that I’d come across while getting rid of stuff recently. And by “photocell” I mean a light-sensitive resistor which changes resistance in accordance with the amount of light striking it. The kind of thing used to automatically turn on lights at dusk.

I set up the photocell a fixed distance above the Alpenglow fixture and connected it to an ohmmeter.

Light Measure

I obtained the following readings:

High power white = 735 ohms
Low power white = 1,230 ohms
High power red = 3,800 ohms
Low power red = 6,250 ohms

I could make the same measurement with the LED version to see how close the light output was to the original. Good idea maybe, but in reality I didn’t control all the other variables very well—like ambient light. But it did give me a rough idea, since I had no idea otherwise of how many LED’s to use to produce equivalent light.

The insides of our older Alpenglow fixtures cannot be removed without cutting the wires to the switches. My plan was to create a new backplate using a piece of aluminum, and stick the LED’s directly to it using their adhesive backing. I would reuse the same Alpenglow switches, retaining the same functions as before so there would be no difference in operation between the converted and non-converted fixtures.

Inside our vintage of Alpenglow fixture, and why even replacing the ballast is a non-trivial task.

I experimented with the LED’s using my light measuring technique, then organized them into two white sections and two red sections. The low power setting would turn on one section, high power would turn on both. The red/white switch would determine whether red or white sections were powered.

LED install

LEDs on

I rewired the existing switches as shown in the schematic diagram below. One of the switches is three-position, double-pole with the center position being off. The other switch is two position, either red or white. Double pole means that two sets of contacts change position when the switch is pressed.

LED conversion

I was somewhat surprised with the result. I did not end up saving any power with the white lights. Too many LED’s? My crude attempt at comparing light output between the fluorescent tube and the LED strip probably had some flaws (lack of ambient light control, for one). I should’ve taken two fixtures off the boat and converted one, using the other for side-by-side comparisons. Next time, maybe.

What I did get, however, is a very bright, instant-on (no warm up required) white light with no ballast to go bad or tubes to burn out.

The red light fared much better (far fewer LED’s were used), producing a significant power savings. In the low power setting, it uses 0.081 Amp, compared to 0.371 for the CFL. Two or three of these could be left on all night with virtually no battery drain and enough light to see while moving about the boat.

Perhaps the best part is, we don’t have to carry any spare fluorescent tubes, and the ballast isn’t going to fail unexpectedly. The conversion of one fixture was maybe $12, with $8 of that going for the aluminum sheet from the hardware store. McMaster-Carr sells some 0.032 inch thick fiberglass sheet that I’m going to try next time. It can possibly be cut with a hefty scissors, is less cost than the single-quantity aluminum sheet, and the soldered connections won’t short out if they come in contact with it.

New backplate

Putting the finished fixture back on the boat and trying it out at night revealed that the new high power setting is noticeably brighter than the old CFL high power setting. To my eye, the LED low power setting is approximately equivalent in light to the CFL high setting. So, perhaps I did achieve a power savings after all.

Rebedding Portlight Glass

Posted by John

I’ve read a definition that says a portlight is the openable glass flap covering a porthole. It also defines a porthole as a round opening in the side of a ship. Since the windows in Mysticeti are not just round, but also oval and rectangular, I’m not sure what they’re all supposed to be called. So even if I’m technically wrong, I’m calling the glass opening a portlight, no matter what shape it’s in.

We have several portlights that have been leaking rain water. Some of the leaking used to be through the seals where the portlight is dogged against the porthole frame. We fixed that several years ago by replacing the rubber seals. It’s the leaking around the glass itself that’s been the most problematic. Back when we replaced the rubber seals, we also took the glass out of one bad leaker and re-caulked it. For some reason the leaking only slowed down, but did not stop completely. With more leaks in more portlights this winter, we decided to try again, but use butyl rubber instead of caulk.

Some time ago we bought a box of butyl rubber tape. It came as rolls, about 1/2 inch wide, with a paper backing to keep it from sticking to itself. We’ve used it to re-bed deck hardware, including the chainplates we replaced last summer.

Butyl Rubber Tape

Mysticeti has six large rectangular and four smaller oval portlights in the main cabin, four oval in the aft cabin, plus two oval and two round in the head, and one round portlight in the engine room, opening to the cockpit.

Mysticeti Large Portlight Area

The glass in the large portlights measures 17 x 9 inches, 1/2 inch thick.

Portlight 17 x 9 glass

Below is a portlight frame with the glass and old caulk removed.

Portlight Frame

We applied the butyl rubber tape to the inside faces that contact the glass. A cast bronze clamping piece fits on the back side of the frame and screws down with 22 bronze machine screws to hold the glass. Butyl tape is also applied around the mating face of the clamp.

Portlight frame with butyl

The butyl rubber gradually deforms under pressure and evenly seals around the edges of the glass. Any gaps where the tape is not hard against the glass are easily seen through the glass from the other side, and fixed by placing a weight on the glass pane and giving it time for the butyl to deform and even out.

Once the old caulk was cleaned off the portlight frames, the butyl rubber was a neat, clean, easy way to affect a watertight seal.

For an El Nino year we’ve had an unusually high amount of rain this winter in the Seattle area. But since rebedding our portlights, we have had no drips. The best part is we no longer have to put drip catchers under them.

We hope this is a long-term solution. Only time will tell.